Tuesday, 5 January 2016
Friday, 11 September 2015
P4 (e) linking audio to visuals and applying audio effects
Music:
For the base audio track of this production I chose to use the track 'adrenaline' from the game Call of Duty Black Ops 2 as it is fast paced and upbeat, grabbing the audiences attention, it also suits well with my theme and genre. To maximise the impact of the track on the audience I ensured that I cut my visuals to match the beat of the music.
Voice Over:
During the preproduction phase I planned for a voice over to accompany my visuals as the video uses advert format in the beginning scenes. In order to record the voice over I found a professional voice actor who was willing to record the script. As my actor was in Russia we used Teamspeak to talk and so I could listen to how he sounded and then direct him, to ensure the voice corresponded with the theme/genre of the video. Once I had the voiceovers I imported them into Premiere Pro and dragged them into the timeline ensuring they corresponded with the correct video clip by referring to my script.


Sound Effects:
In the end half of the video I required sound effects to match with the visuals. In order to create realistic and high quality SFX I used my Rode Video Mic-R connected to my Canon750D to record the desired sounds. If I was unable to make an effect I downloaded free sound effects from online sites, or recorded sound from video games.
For the base audio track of this production I chose to use the track 'adrenaline' from the game Call of Duty Black Ops 2 as it is fast paced and upbeat, grabbing the audiences attention, it also suits well with my theme and genre. To maximise the impact of the track on the audience I ensured that I cut my visuals to match the beat of the music.
Voice Over:
During the preproduction phase I planned for a voice over to accompany my visuals as the video uses advert format in the beginning scenes. In order to record the voice over I found a professional voice actor who was willing to record the script. As my actor was in Russia we used Teamspeak to talk and so I could listen to how he sounded and then direct him, to ensure the voice corresponded with the theme/genre of the video. Once I had the voiceovers I imported them into Premiere Pro and dragged them into the timeline ensuring they corresponded with the correct video clip by referring to my script.

Once I'd linked the audio to the clip I had to sometime cut the audio so it came in at the correct time, this meant using the ripple edit tool to cut off the beginning and endings of the audio clips.
Sound Effects:
In the end half of the video I required sound effects to match with the visuals. In order to create realistic and high quality SFX I used my Rode Video Mic-R connected to my Canon750D to record the desired sounds. If I was unable to make an effect I downloaded free sound effects from online sites, or recorded sound from video games.
P4 (d) applying transitions
Applying Transitions

Applying Motion Graphic
In order to create smooth transitions between clips I used Premiere Pro's default transition effects. I then dragged the effect onto the end of the clip I wanted the transition to occur on.

Applying Motion Graphic
During the scripting and storyboard process I planned a range of VFX shots and Motion Graphics sequences, to be incorporated with my real time footage. Using a combination of After Effects and 3DSMax I have created these sequences based of my planning resources.
For this motion graphics sequence I was using the following brief:

Throughout the process of creating this motion graphics sequence I ensured that what I had on screen corresponded with my voice over, in terms of text and imagery.
To create this sequence I used After Effects CS6, these are the steps I took:
Text:
Using the text tool (ctrl+t) I created a text layer I did this for each number and word. After this I animated the position modifier of each layer to move their position.
I also applied the Easy Ease keyframe assistant, When you ease the speed of an object, the object slows down as it approaches a keyframe, and gradually accelerates as it leaves. You can ease speed when coming into or out of a keyframe, or both. This gives the impression of more realistic and fluid movement.
 |
| Here I selected Easy Ease |
Once I had done this I pre-composed the composition and imported into the tanks composition which I named GFX 1.
GFX 1:
First I imported the text pre-composition, this allowed me to time when I needed to animate the tanks to fly past the text.
 |
| The key framed layers. |
To create the tanks I used a mask layer to cut out the images of the tanks. I then key-framed one tanks position modifier to move from left to right, I then copied these keyframes and applied them to all tank layers. To ensure each tank came in the correct order I moved their position on the timeline so that their key frames aligned, so as one left the frame another entered.
| Selecting the layers position stopwatch enabled me to change its position properties over time. |
In order to give the effect of the image moving I applied the motion blur switch, that simulates shutter duration and blurs the images as it moves.
 |
| Motion Blur Switch Applied |
Main Composition
To finalise this project I created a new composition named 'main' and then imported the composition 'GFX 1' I then imported a background image and applied the Gaussian Blur effect, I moved the background layer to the back and left it as a 2D layer so it wasn't effected by the camera.

Finally I copied the tank graphics from GFX and re-animated their position values and moved them further along the timeline enter frame later on.

Sherman and Panther Sequence
In the planning stage these were the notes I created to guide my editing decisions:


For these scenes I wanted designs that would relate to the product I was 'advertising' this involved choosing a colour scheme, font and even the pace at which the camera moved. For both scenes I wanted the colour scheme to relate to their respective nations so for the Sherman I chose green and yellow as it's traditionally associated with the colour scheme of US military, for the Panther I chose the hard hitting colours of the German flag.
In terms of font I decided to use a military styled font as it related to the content of the video and grabs the audiences attention. In terms of camera movement and pacing I used the V/O to guide how fast the sequence was.
Creating the Graphics
First I created a new composition ensuring that it was 1920x1080 at 24fps. In both sequences I enabled the 3D option on all background layers and created a 3D camera, this meant I could create a large background template and then animate the position of the camera to move around the scene. I then overlaid 3D text layers above the background plate and animated the camera to move past the text. To create a background template I created a solid green layer then overlaid a grunge texture above it.
 |
| Here I enabled the 3D option on each layer. The layer Camera 1 was then animated to move around the background plate. |
 |
| This image shows the background plate I created using a grunge texture and a green solid layer. |
 |
| This is an overview of the composition showing the scene from multiple perspectives. |
 |
| This is an overview of the Panther composition. Final Results: Once I'd finished compositing both compositions I rendered them to .mov format and then imported them into after effects. |
P4 (c) Applying planned visual effects
Applying Planned VFX and Motion Graphics
3D COMPOSITION
This stage required me to match the shooting conditions of the scene e.g Camera position and Lighting to match the scene properties in 3DSmax.
Camera Mapping: In order to place 3D objects into a scene I had to go through the process of camera mapping, camera mapping means recreating the position of the camera in the 3D software in order for perspective to be correct.

Creating the lighting: To light my scene in 3DSmax I used the V-ray sunlight tool to create a source of light, however this light was over exposed and did not reflect the lighting in my video footage. In order to match the lighting this is the process I had to use 3dsmaxs built in exposure control tools that enabled me to match the lighting in the scene.
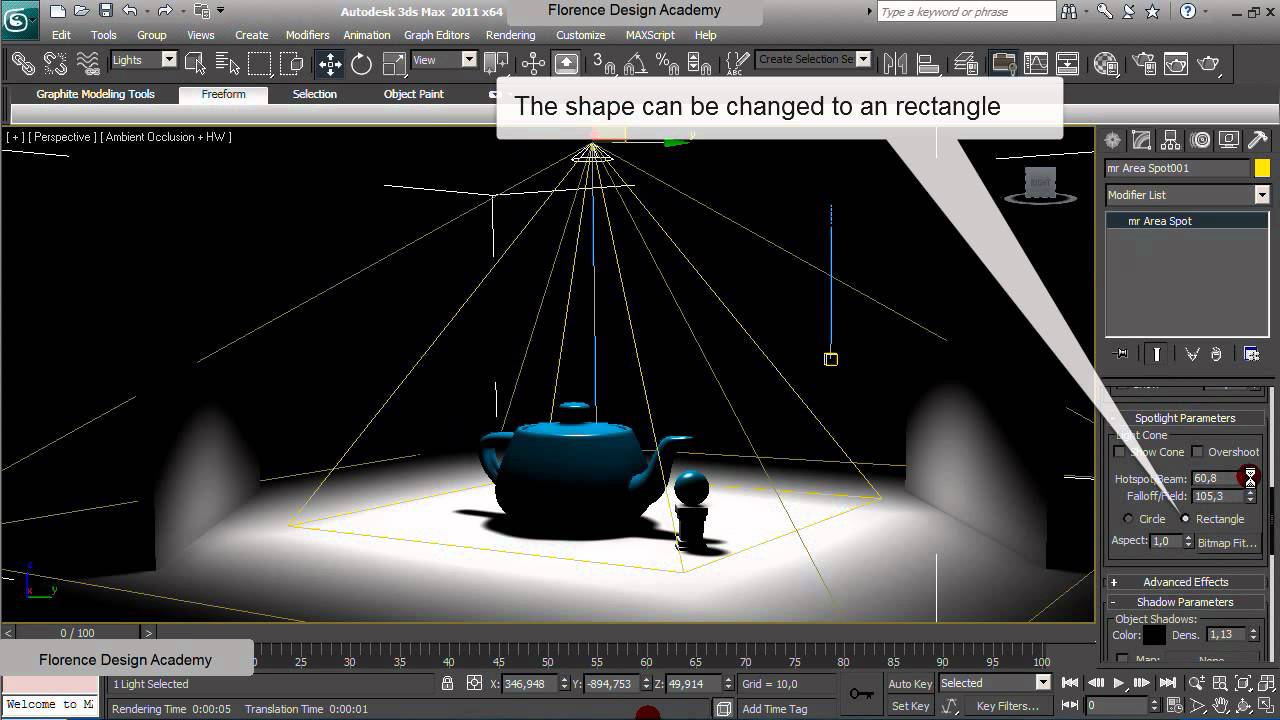
Render Setup: Once I had finished setting up the scene I was ready to render. To ensure that I had the most realistic looking results I adjusted my render settings to suit the scene I was compositing the tank into.

2D COMPOSITION
AE composition: The final stage of this effect was compositing the rendered tank image over the original footage in Adobe After Effects. I imported the tanks beauty and shadow pass into the project and dragged them into my composition, after this I key framed their scale for the tank to grow in size as it the lightning strikes the table.
Add Lightning Effect:
First I created a solid colour layer that I placed at the top of the composition, I then applied the lightning effect, this turned my solid layer to resemble lightning however I still had to adjust some parameters of the effect, such as positioning, colour and speed I also applied a glow effect to emphasize the effect. Once I was happy with the lightning bolt I'd created I key-framed the aforementioned parameters so to give the effect of the bolt coming from the actors eyes, which had been planned in my script:


Creating Muzzle Flashes:
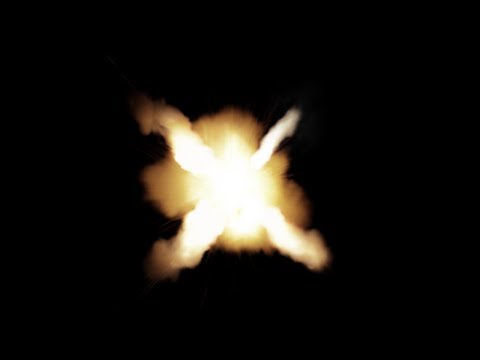
In order to create the flashes from the muzzle of the tanks barrel I had to import 2D video assets from Video Copilots action essentials pack that contains hundreds of stock footage of explosions, fire and smoke that have been prepared for composition, meaning when overlaid on footage the background is removed.
The image below is an example of the stock footage used.

Once I'd finished creating the effects in After Effects I then exported these clips to mov format at 24 FPS, to match the FPS of my Premiere Pro sequence. I then imported these edited clips into Premiere Pro and replaced the placeholder videos with the new edits.
COLOUR GRADING
The most significant impact colour grading has on the film is the impact on the tone/mood or atmosphere of the scene, for example in Comedies or kids shows colours are often very bright and warm to create a more friendly feel while in war, action or horror films colours tend to be darker with hints of blue or green shading. I have used both types of colour grading in my film as the film has two very distinct moods that change half way through the production.
 |
| This is the Magic Bullet Looks window that pops up when the effect is applied to a layer. |
 |
| This is the preset panel within Magic Bullet that allows you to apply colour correction presets. |
 |
| This lower panel allows you to select, add and remove individual effects so you're able to fully customise your effect. |
GREENSCREEN
Chroma key compositing, or chroma keying, is a special effects / post-production technique for compositing (layering) two images or video streams together based on colour hues (chroma range).

This technique has been used heavily in many fields to remove a background from the subject of a photo or video – particularly the newscasting, motion picture and post production industries.
In my production I used this method to remove the background from an actor so I could replace it with a 2D graphic that I had created on Photoshop

One day my actor could not reach me, this meant I had to go to his house and shoot instead, however I needed it to look as if he was on set, so to solve this I took a greenscreen and replaced the background in After Effects.

P4 (b) producing and reviewing an off line edit
Producing and reviewing an off line edit required me to place my logged selection
of shots into the timeline sequence in order without applying
effects, as I'd based the names of my shots on my shot list this process was relatively easy as I structured them in numerical order. Before applying any effects however I reviewed the entire sequence so to ensure that the story was clear. Once I'd reviewed the sequence I chose to cut down the length of some clips to match the intended pace of the production, to ensure the pace was aligned with the theme and genre of the production. In this case I wanted short sharp cuts to emphasise speed and explosiveness that related to the theme of the ad. In order to do this I used premiere pros 'tools' panel.

However when editing I found that some footage did not translate the story as well as I'd intended so I decided to either remove, replace or reorder the footage to improve the quality of the video.
Below are some examples of when I had to alter my offline edit:
1.


2.
In this situation I had planned for too many action scenes involving tanks, due to the length of time it takes to create this effect I had to cut out multiple shots from the offline edit.


| Tools Panel |
 |
| Timeline showing the edits I've made. |
However when editing I found that some footage did not translate the story as well as I'd intended so I decided to either remove, replace or reorder the footage to improve the quality of the video.
Below are some examples of when I had to alter my offline edit:
1.

In this scene in the script I'd planned to film a shot of Actor 2 falling off his chair to and use a portal shot to show him landing in a field, however I was unable to shoot this shot thus had to make the following change in the edit:

2.
In this situation I had planned for too many action scenes involving tanks, due to the length of time it takes to create this effect I had to cut out multiple shots from the offline edit.

 |
| Here is an example of where I had to change the offline edit as I was unable to achieve what I had planned in my storyboard. |
3.
In this case I had to find another shot that I could use to replace a shot that was never filmed due to an actor being unavailable, this mean having to create a place holder graphic until I could replace the shot.


P4 (a) logging rushes & decision list
Logging Rushes:
Once I had shot my footage I imported my footage onto the device I was editing with and saved the footage into my project folder. I made the decision that I would re-name all my footage within the windows explorer then imported all my footage into my Premiere Pro sequence
ensuring that the footage matched the 1920x1080 size of my sequence.


 |
| Edit Decision List |
Once in Premier Pro I reviewed each variation of each shot I had taken, once I'd found my favourite variation from each shot I renamed them in accordance to their name on the shot list I created in the pre-production stage e.g shot 1, shot 2, shot 3 etc. I then deleted the unusable variants from the project, this still meant I could re-import them if I changed my mind.
This saved time as I did not have to rename shots that I would of never used.
The image below shows a screenshot of my completed offline edit, I felt I had completed this stage once all my footage was in the correct correct that I had planned in the planning stage, for some footage I had to use placeholder frames til I filmed the remainder of the footage allowing me to continue onto the online edit.

The image below shows a screenshot of my completed offline edit, I felt I had completed this stage once all my footage was in the correct correct that I had planned in the planning stage, for some footage I had to use placeholder frames til I filmed the remainder of the footage allowing me to continue onto the online edit.
 |
| This image shows my film in the offline edit stage before any VFX were applied |
P3 (d) following production processes
Adjusting production process to suit VFX:
When a scene involves VFX the director has to be flexible and understand how the effect is going to work using planning material and also listening to the VFX supervisor, on my shoot I was both the director and VFX supervisor so I was able to quickly adapt to my location especially as I had performed a recce, this meant when it came to the shoot I knew where and when I should take the shots.
When shooting my indoor scenes I had the issue of quite low lighting which came from tungsten lights, this meant I had to adjust my ISO, Shutter speed and Aperture to allow enough light into the camera without deteriorating the quality of the footage. I also had to adjust my production process for the shooting of the VFX shots, when shooting these shots I had to ensure I was using the tripod to keep the camera as still as possible otherwise I would have to track the camera position which would consume a lot of time in the editing process. I also decided to shoot the production in a non linear order this meant I could shoot all the scenes with my actors in one go and then focus on getting the VFX shots once my actors were gone.
Camera Settings:
The Canon750D is a DSLR camera, this allowed me to use manual mode to adjust the camera's ISO, Shutter speed and aperture, also known as the exposure triangle.
ISO:
ISO is the level of sensitivity of your camera to available light. It is typically measured in numbers, a lower number representing lower sensitivity to available light, while higher numbers mean more sensitivity. More sensitivity comes at the cost though, as the ISO increases, so does the grain/noise in the footage.

Shutter Speed:
Shutter Speed is the length of time a camera shutter is open to expose light into the camera sensor. Shutter speeds are typically measured in fractions of a second, when they are under a second. Slow speeds allow more light into the camera sensor and are used for low-light and night photography, while fast shutter speeds help to freeze motion.

Aperture:
Aperture is the hole within a lens, through which light travels into the camera. The larger the hole, the more light passes to the camera sensor. Aperture also controls the depth of field, which is the portion of a scene that appears to be sharp. If the aperture is very small, the depth of field is large, while if the aperture is large, the depth of field is small.
In order to suit the low lighting of the indoor set I had to adjust these settings to allow more light into the camera, this meant lowering the shutter speed while using a higher ISO and aperture to increase the cameras sensitivity to light. However I did find these settings lead to a grainier image that had a very shallow depth of field, this caused issues with quality. To correct this I increased the level of lighting in the scene and took test shots, until I found the correct settings.

White Balance:
The indoor shoot also meant I was shooting under tungsten lighting, this results in the footage looking yellow. To reduce this I used the 750Ds white balance preset 'tungsten' to correct the lighting, this meant avoiding having to make the corrections in post production and improved the overall quality of the footage.

Setting up Equipment:
Tripod:
The DV6000 tripod is a simple tripod to setup. I extended the legs to their maximum length and the removed the baseplate to screw it onto the bottom of the camera before slotting it back into place.

Visualization/Realisation of Effects:
Bringing my effects to life was an important aspect of my production. Below is an example of how I bought one scene to life, from storyboard to live action. Although the camera angle, character and prop positioning had to change due to the shooting conditions, I retained the concept of a character shooting electricity from their eyes to make a tank bigger and have realised the vision. I did this most in the editing phase in which I used after effects to create the electricity beams and 3DS max to insert the 3D tanks.


Setting up the green screen was necessary for some of my shots as I required a shot of an actor in which I would have to remove the background and replace it.

When a scene involves VFX the director has to be flexible and understand how the effect is going to work using planning material and also listening to the VFX supervisor, on my shoot I was both the director and VFX supervisor so I was able to quickly adapt to my location especially as I had performed a recce, this meant when it came to the shoot I knew where and when I should take the shots.
When shooting my indoor scenes I had the issue of quite low lighting which came from tungsten lights, this meant I had to adjust my ISO, Shutter speed and Aperture to allow enough light into the camera without deteriorating the quality of the footage. I also had to adjust my production process for the shooting of the VFX shots, when shooting these shots I had to ensure I was using the tripod to keep the camera as still as possible otherwise I would have to track the camera position which would consume a lot of time in the editing process. I also decided to shoot the production in a non linear order this meant I could shoot all the scenes with my actors in one go and then focus on getting the VFX shots once my actors were gone.
Camera Settings:
The Canon750D is a DSLR camera, this allowed me to use manual mode to adjust the camera's ISO, Shutter speed and aperture, also known as the exposure triangle.
ISO:
ISO is the level of sensitivity of your camera to available light. It is typically measured in numbers, a lower number representing lower sensitivity to available light, while higher numbers mean more sensitivity. More sensitivity comes at the cost though, as the ISO increases, so does the grain/noise in the footage.

Shutter Speed:
Shutter Speed is the length of time a camera shutter is open to expose light into the camera sensor. Shutter speeds are typically measured in fractions of a second, when they are under a second. Slow speeds allow more light into the camera sensor and are used for low-light and night photography, while fast shutter speeds help to freeze motion.
Aperture:
Aperture is the hole within a lens, through which light travels into the camera. The larger the hole, the more light passes to the camera sensor. Aperture also controls the depth of field, which is the portion of a scene that appears to be sharp. If the aperture is very small, the depth of field is large, while if the aperture is large, the depth of field is small.
In order to suit the low lighting of the indoor set I had to adjust these settings to allow more light into the camera, this meant lowering the shutter speed while using a higher ISO and aperture to increase the cameras sensitivity to light. However I did find these settings lead to a grainier image that had a very shallow depth of field, this caused issues with quality. To correct this I increased the level of lighting in the scene and took test shots, until I found the correct settings.
White Balance:
The indoor shoot also meant I was shooting under tungsten lighting, this results in the footage looking yellow. To reduce this I used the 750Ds white balance preset 'tungsten' to correct the lighting, this meant avoiding having to make the corrections in post production and improved the overall quality of the footage.

Setting up Equipment:
Tripod:
The DV6000 tripod is a simple tripod to setup. I extended the legs to their maximum length and the removed the baseplate to screw it onto the bottom of the camera before slotting it back into place.

Visualization/Realisation of Effects:
Bringing my effects to life was an important aspect of my production. Below is an example of how I bought one scene to life, from storyboard to live action. Although the camera angle, character and prop positioning had to change due to the shooting conditions, I retained the concept of a character shooting electricity from their eyes to make a tank bigger and have realised the vision. I did this most in the editing phase in which I used after effects to create the electricity beams and 3DS max to insert the 3D tanks.


These two images below also demonstrate how I have realised my visualisation of this effect, by inserting the appropriate graphics and text. When shooting this shot I was forced to reposition the prop due to the nature of the set, this meant there was a small discrepancy between the the visualisation and realisation of the scene.


Setting up the green screen was necessary for some of my shots as I required a shot of an actor in which I would have to remove the background and replace it.

Subscribe to:
Comments (Atom)